If you prefer the video format, we've created bite-sized videos to help you understand the basics of NewArc.ai. Watch them on YouTube.
First off, let's make sure you know what to expect from the service.
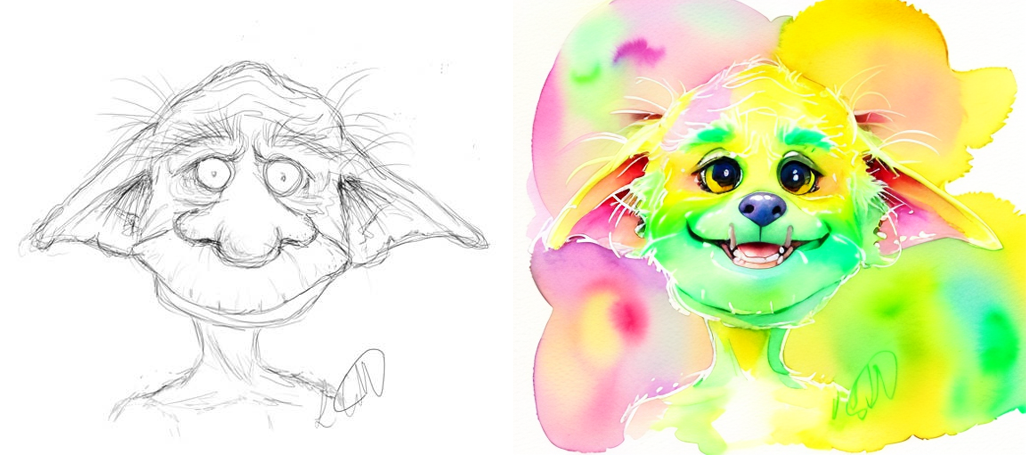
Our AI tool is pretty creative. It doesn't always follow every instruction you give when generating your images. You'll see some variations, even when you describe specific styles and colours. This made NewArc.ai brilliant for sparking new ideas!
But no worries, if you want to get a refined image where you are happy with every subtle detail, you can use our Editing tools to put the finishing touches on the image to achieve perfection.
Use NewArc.ai to get inspired and generate final versions of the images you have in mind!
How it works
Watch a 1-minute demo video:
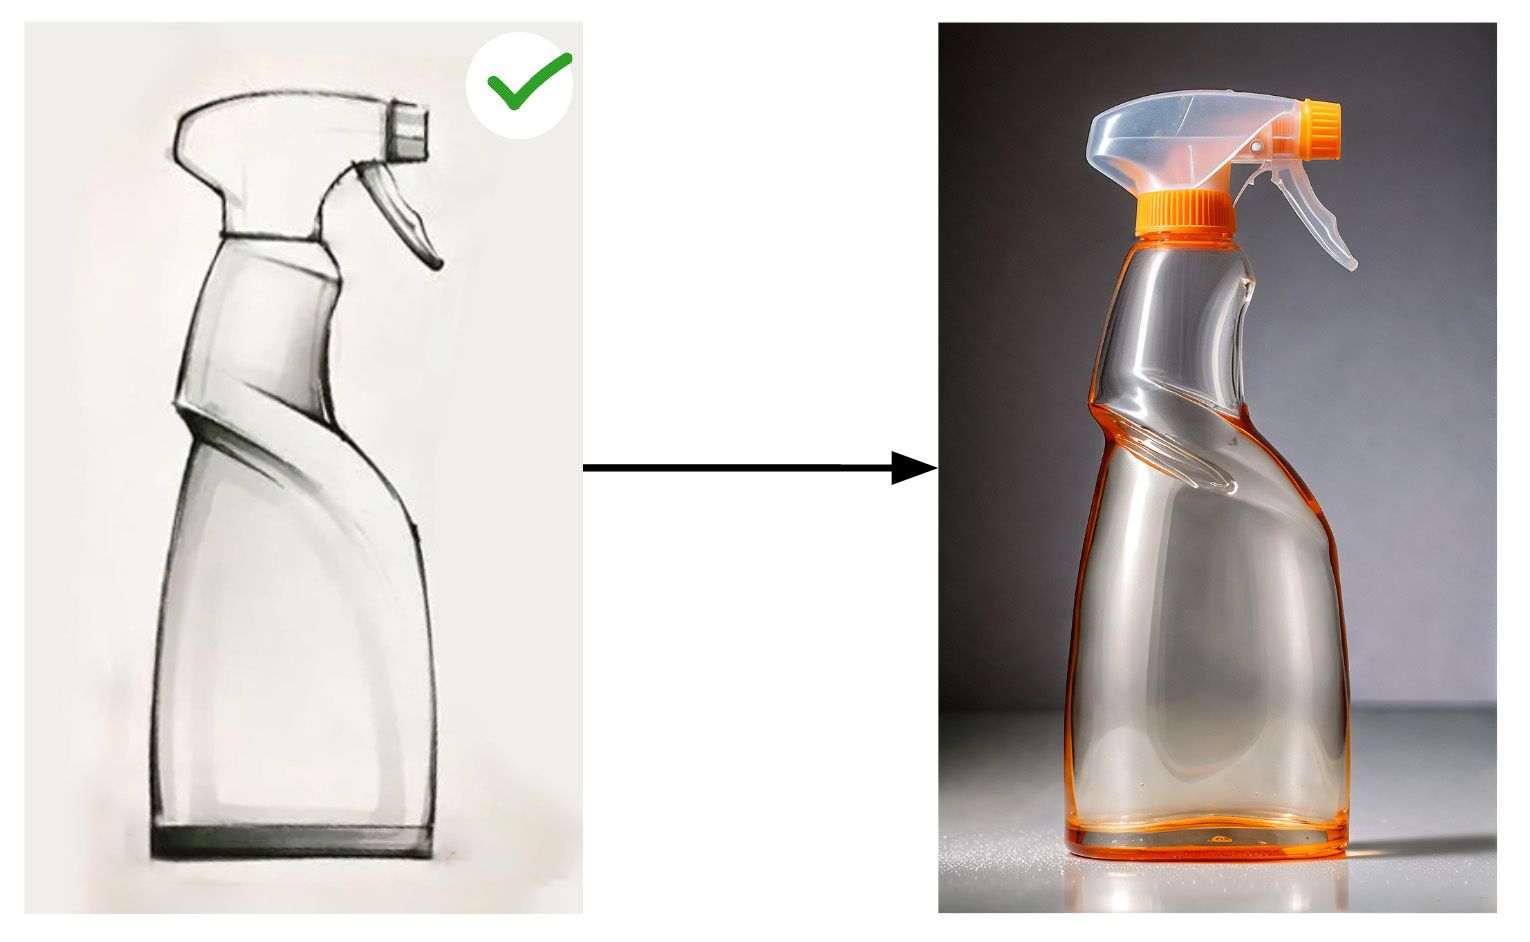
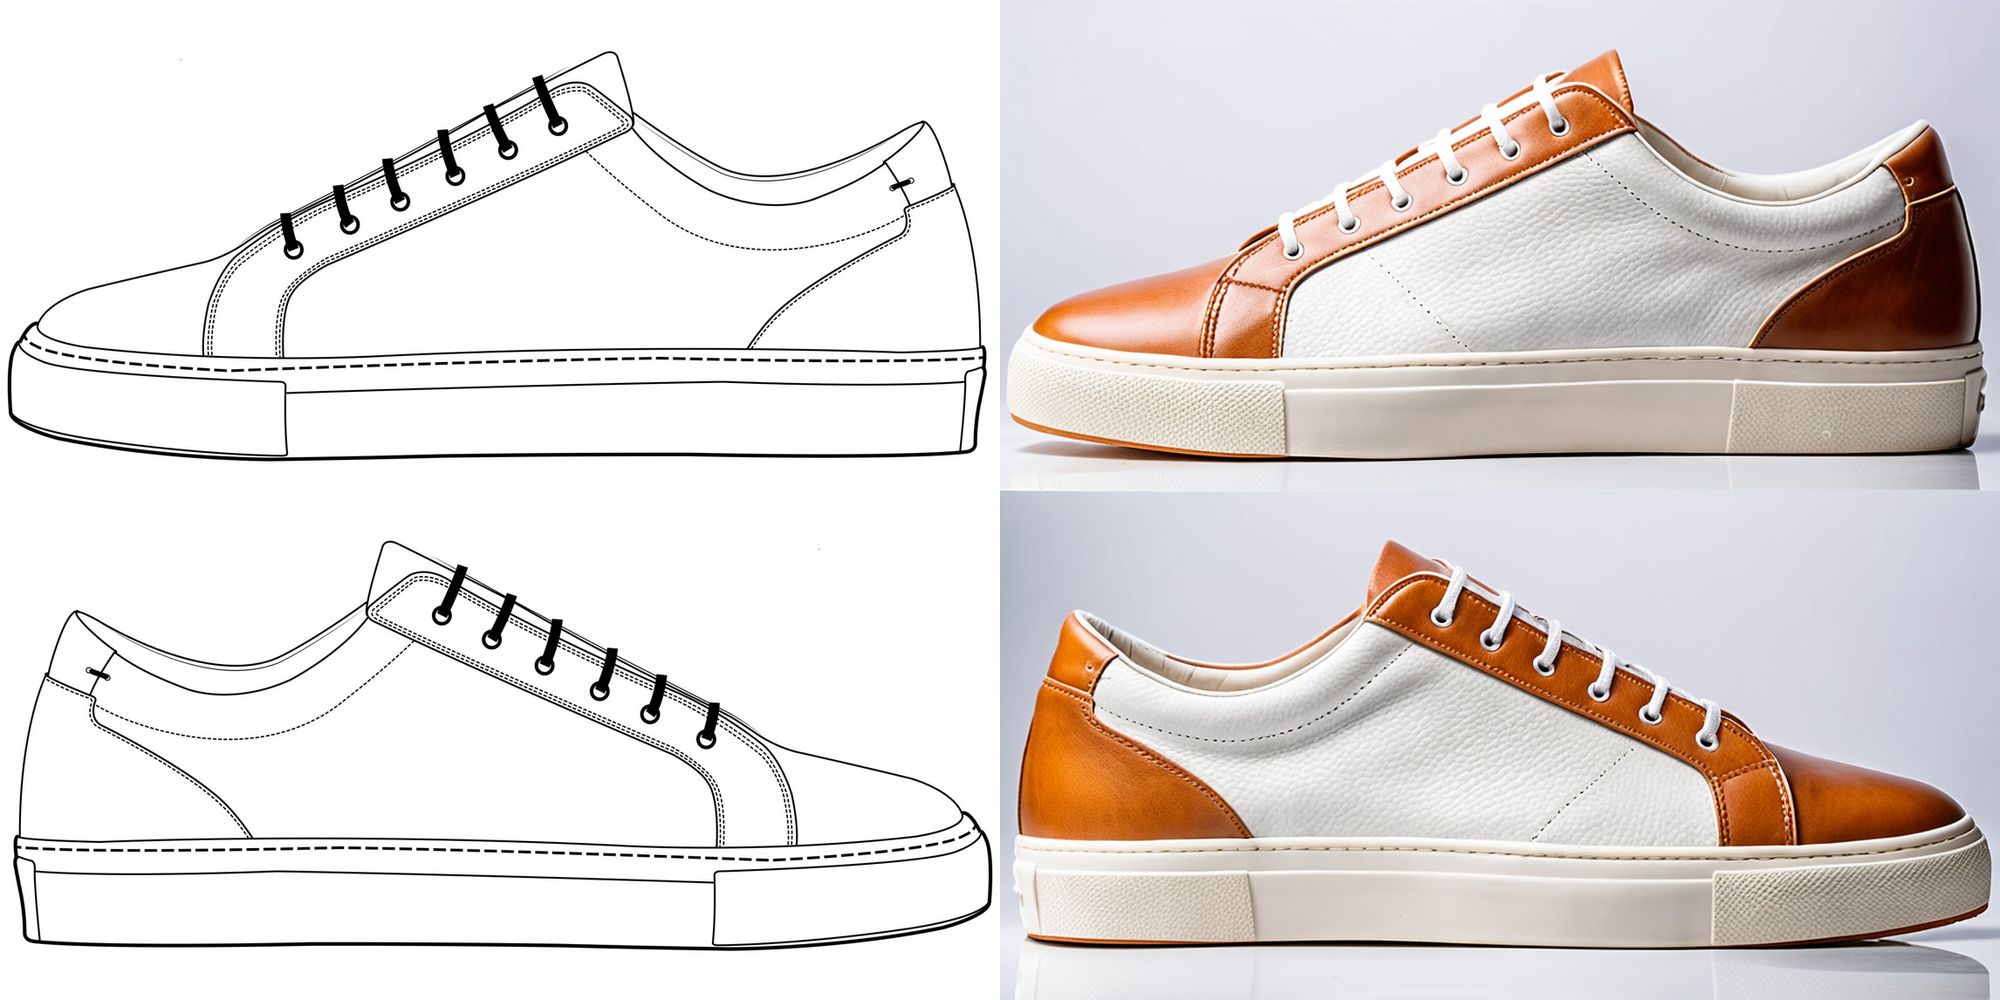
To use NewArc.ai, you start by providing an input image. This could be anything from a hand-drawn sketch or a simple line drawing to a photo.
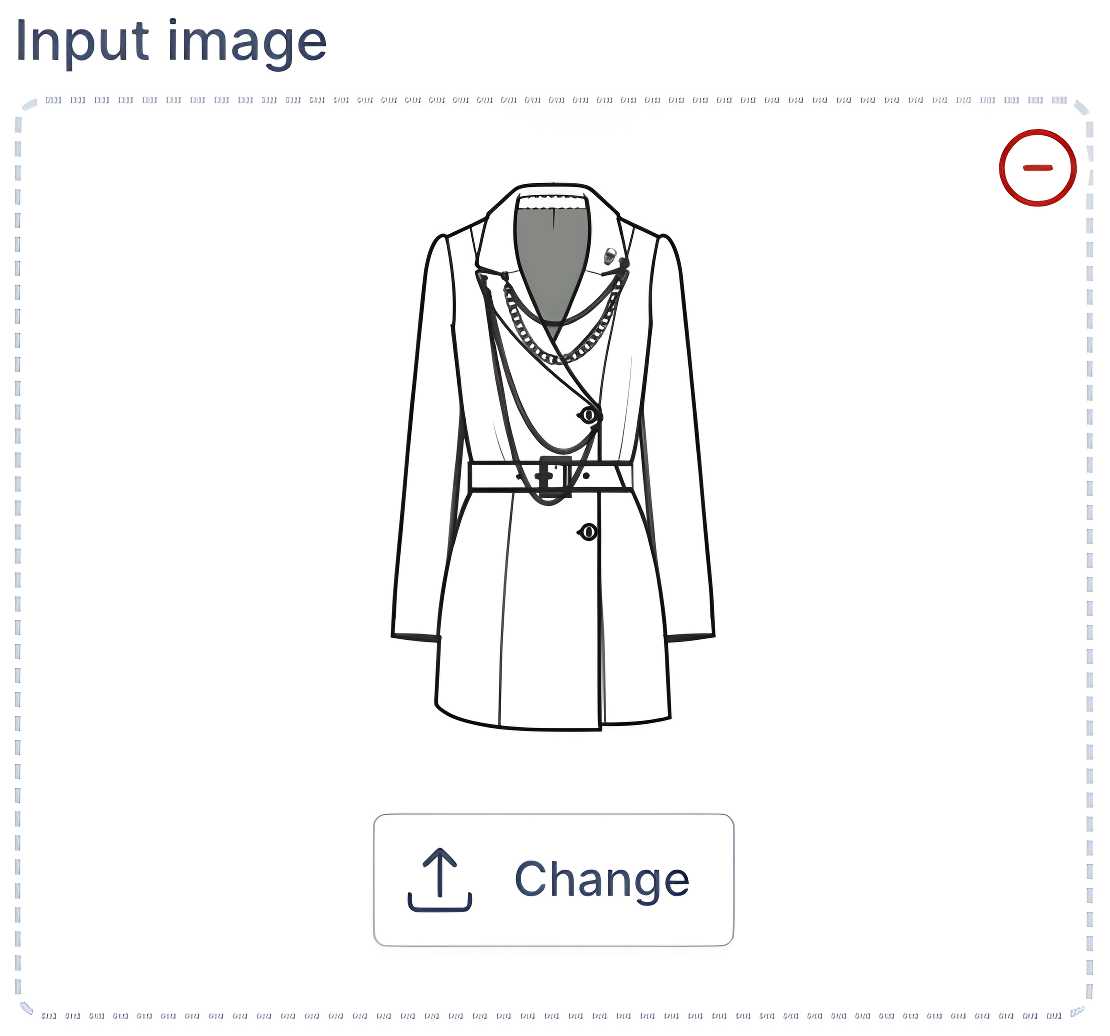
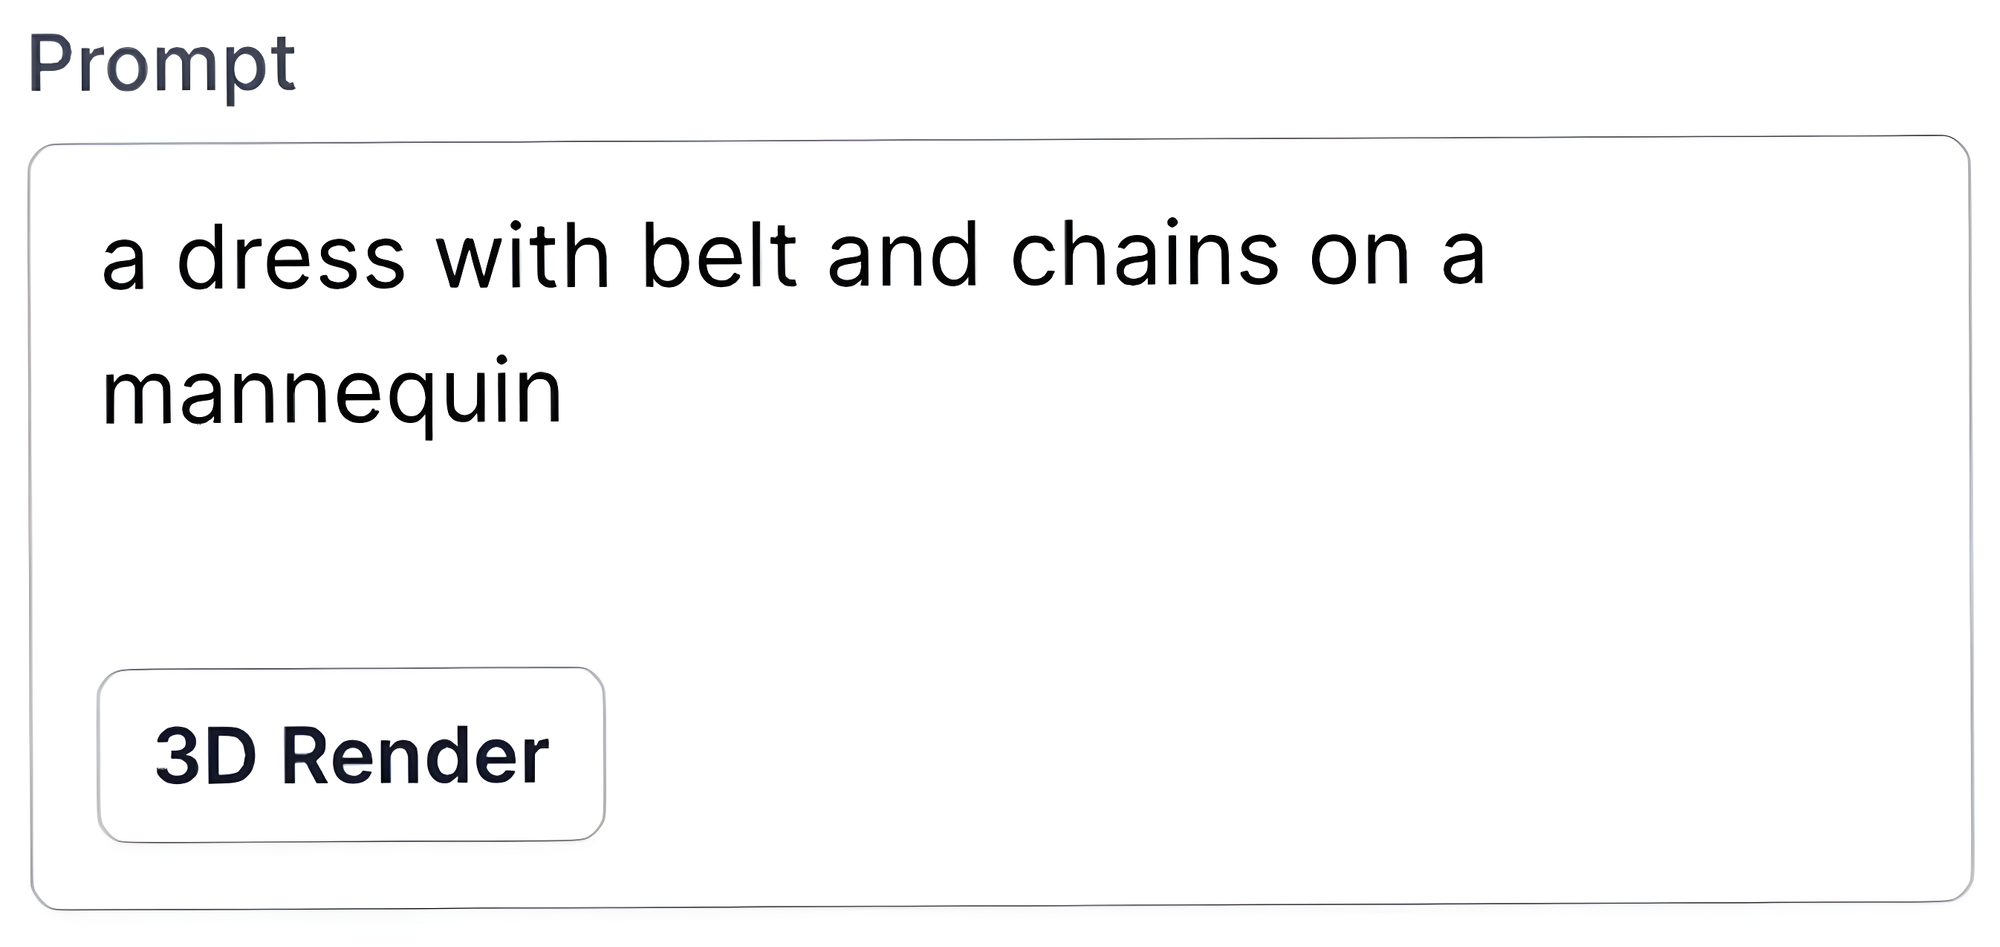
Once you've uploaded your image, you'll need to describe what's in it. This includes the key elements and any specific details you want to have in the generated images.
Then the AI starts to work. NewArc.ai generates a series of images that follow the input image lines and your prompt as closely as possible.
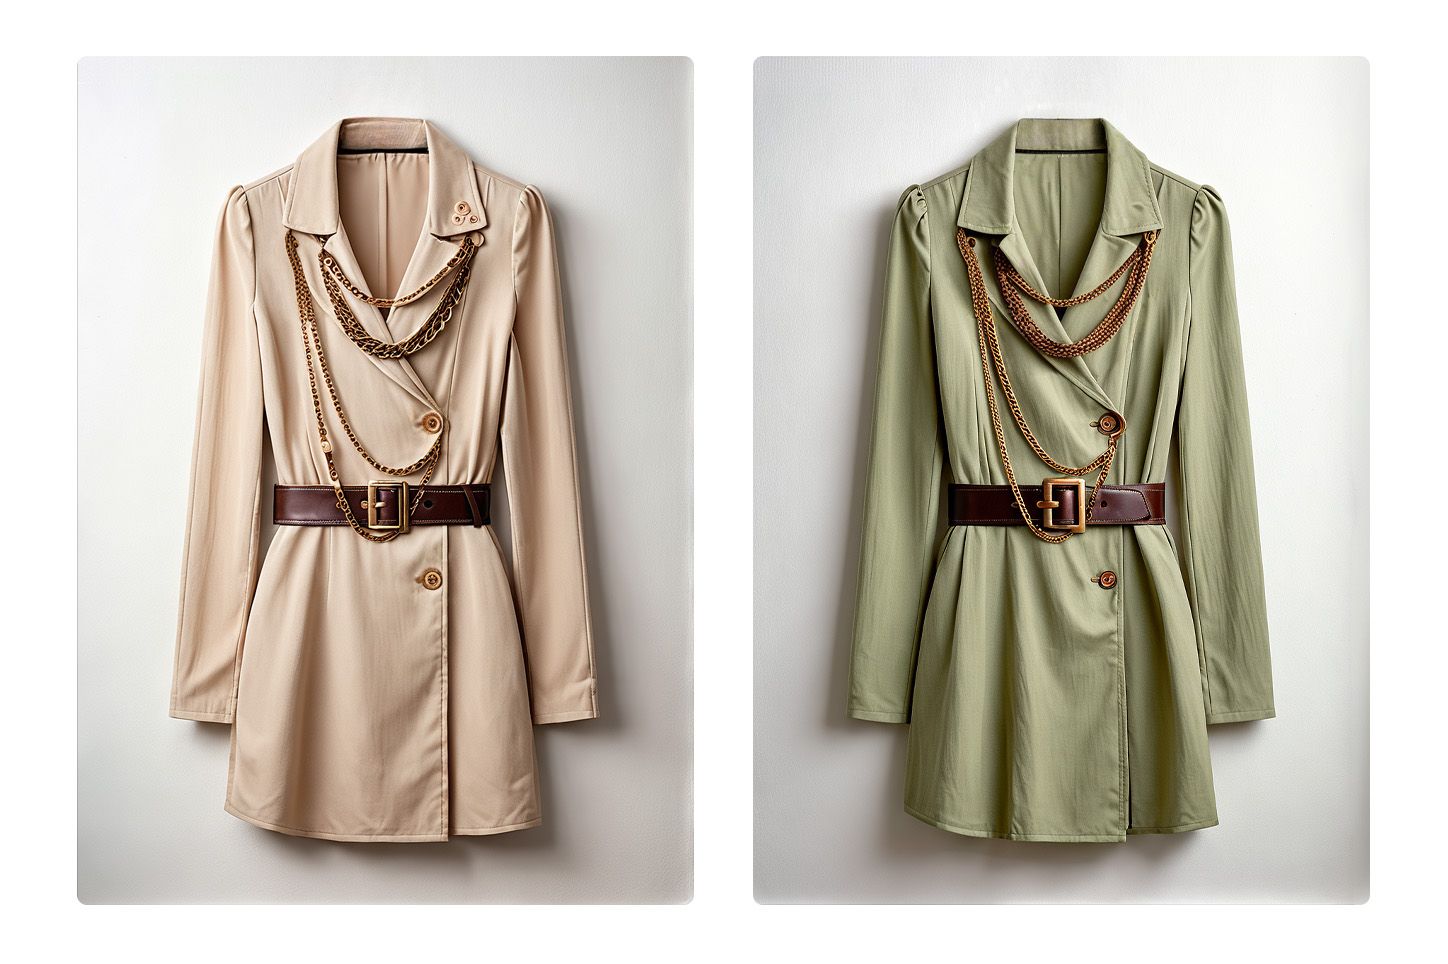
Remember, while AI is intelligent, it's also creative! It will try to add its own unique touches to each image. Check out the tips below to help guide this process and ensure you get the best results.
Useful tips
1. Describe your input image in the prompt
Provide a formal description of what you have in your input image and what you want to get in the generated images.
Make sure you name the objects in your input image. E.g. if you have a sneaker in your input image, you need to add "sneaker" to your prompt.
- Correct: A fashion sneaker with a black sole. ✅
- Incorrect: Turn this sketch into a 3D object. ❌
- Incorrect: Fashion, black sole. ❌
2. Your image and prompt should match
Let's say you added a side view of a shoe as an input image. Then you need to write a correct prompt.
- Correct: "Shoe" or "Side view of a shoe". ✅
- Incorrect: Top view of a shoe. ❌
The same applies if you add a crocodile as an input image and write "giraffe" as a prompt.
3. Service can't remove elements from your input image
If you have an object in your input image, such as a coffee table in the middle of your living room, it will appear in the generated images.
The only way to remove the object from the generated images is to remove it from your input image in any graphics editor.
4. Use colors from your sketch
If you have colors in your sketch that you'd like to have in your generated images, then:
- Turn on the "Enhance color guidance" feature
- Describe colors in your prompt

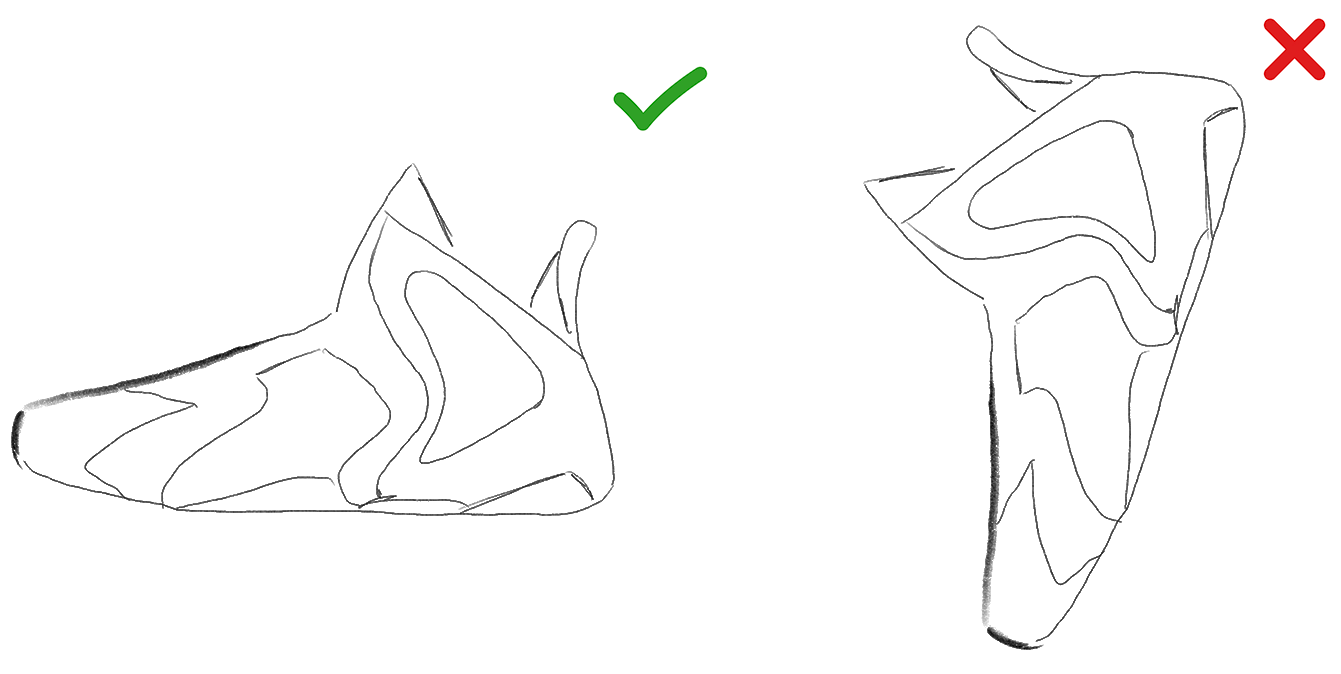
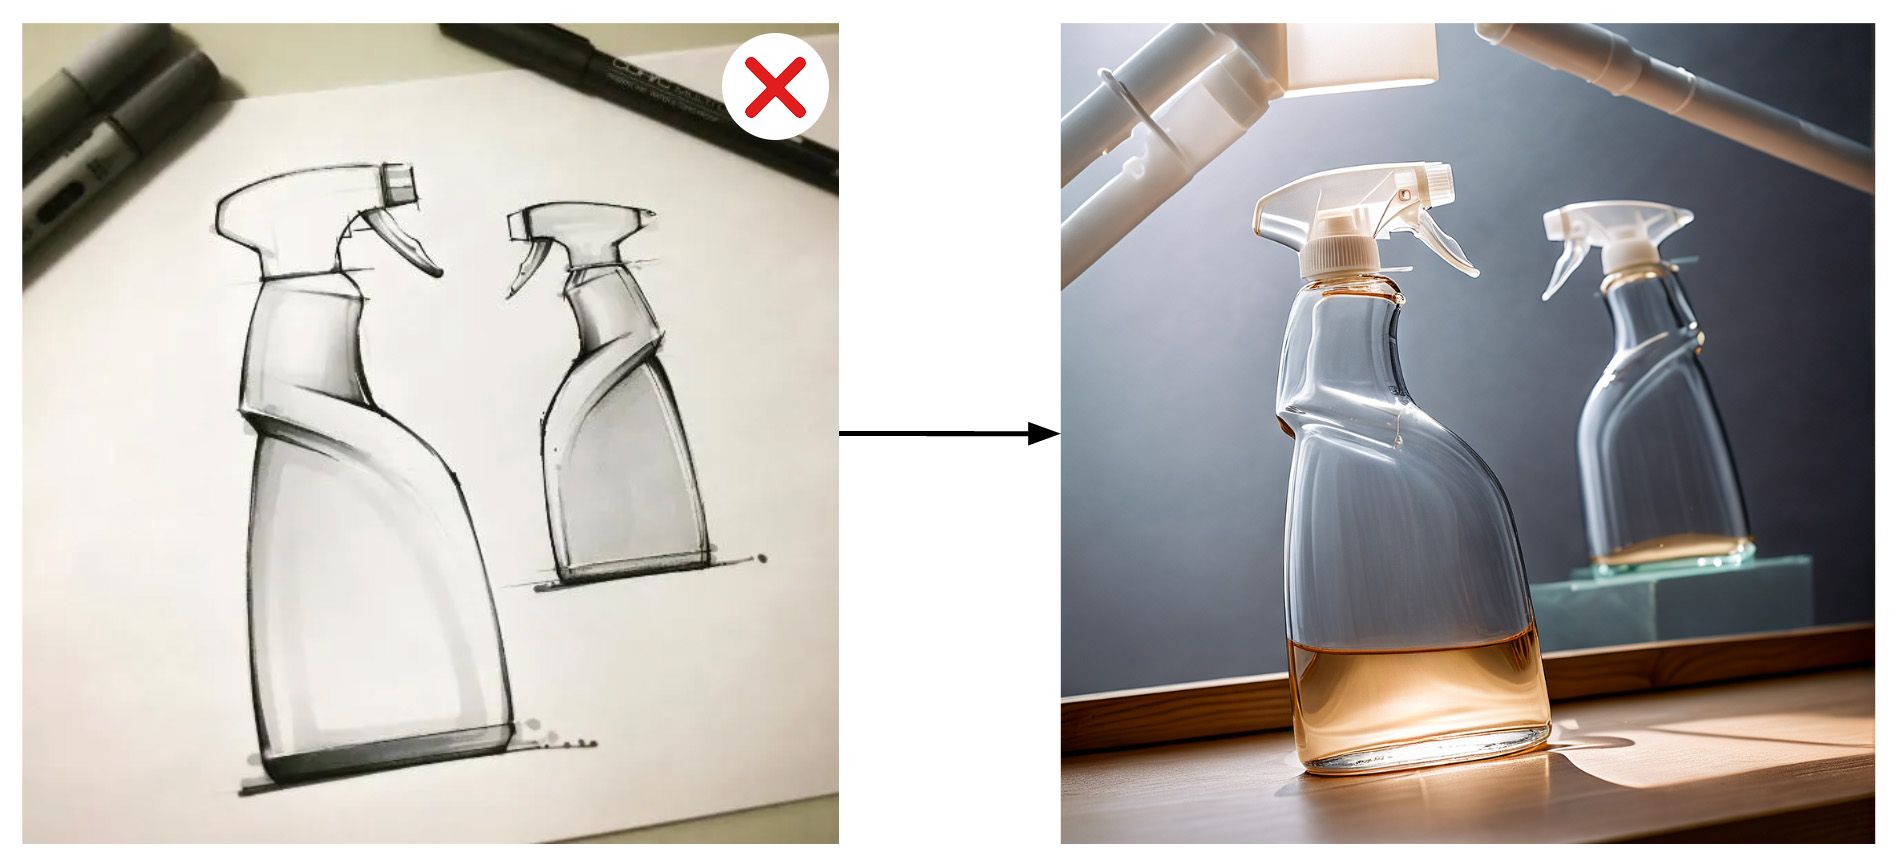
5. Position things correctly in your input image
Things should be positioned as they would in real life. For example, a sneaker should be horizontal, and a hot air balloon should be vertical.
6. Remove unnecessary details from an input image
Remove objects and lines from the input image that you don't want to affect the generated images. Bear in mind that every object and every line in the input image will affect the generated images.
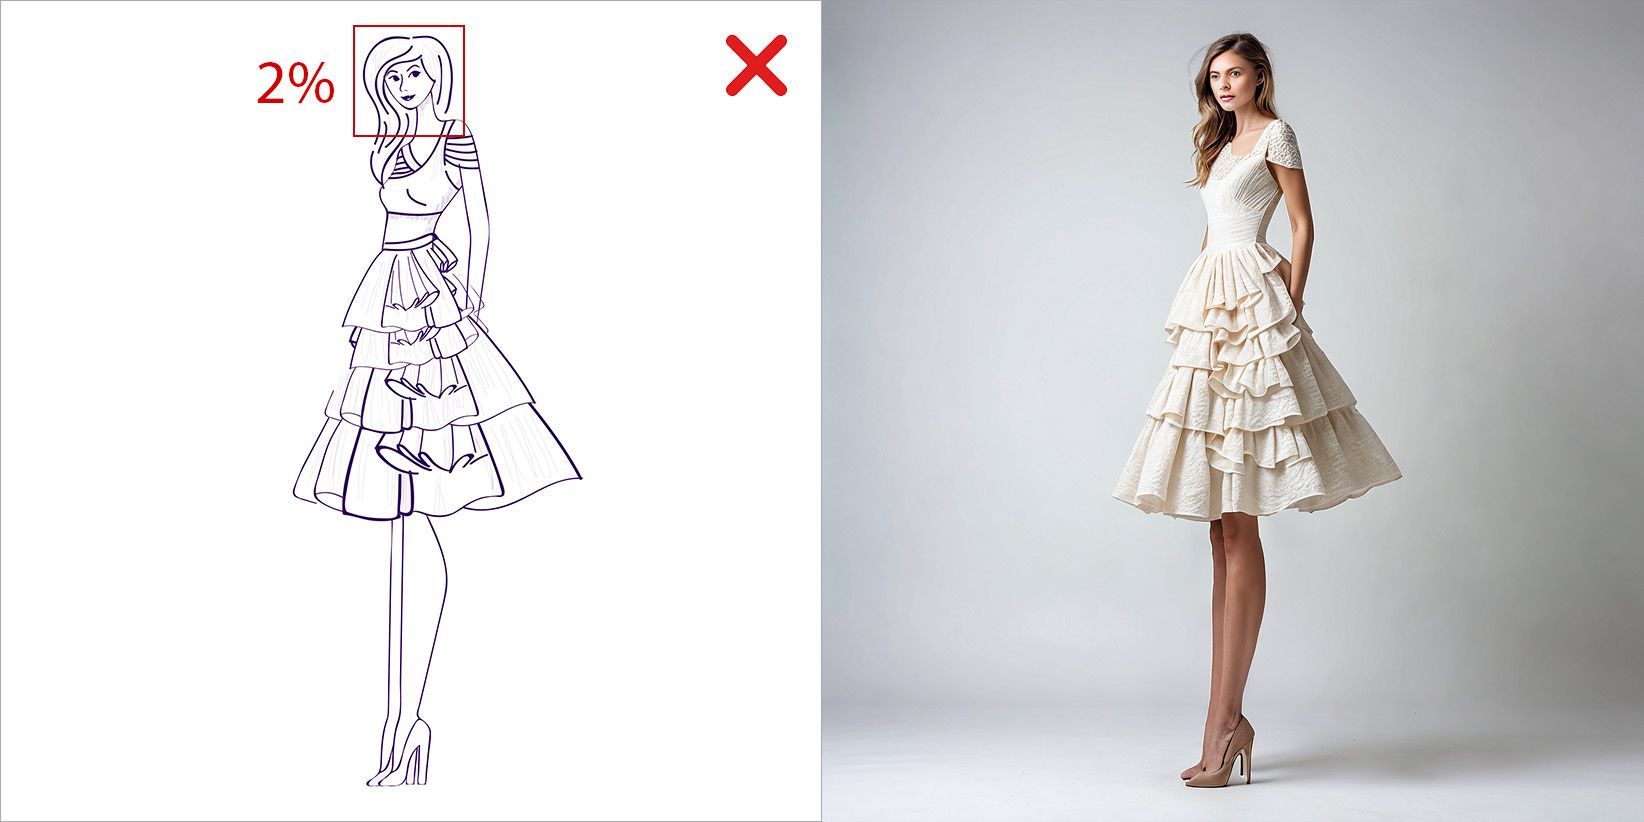
7. The larger the objects, the better
AI doesn't work well with small objects. The larger the area that the object occupies in the input image, the better the quality of that object will be in the generated images.
So if you have some space around your object that can be sacrificed to give the main object more area, it's probably worth doing.
Here the face takes up 2% of the input image. That's why the face in the generated images could be better.
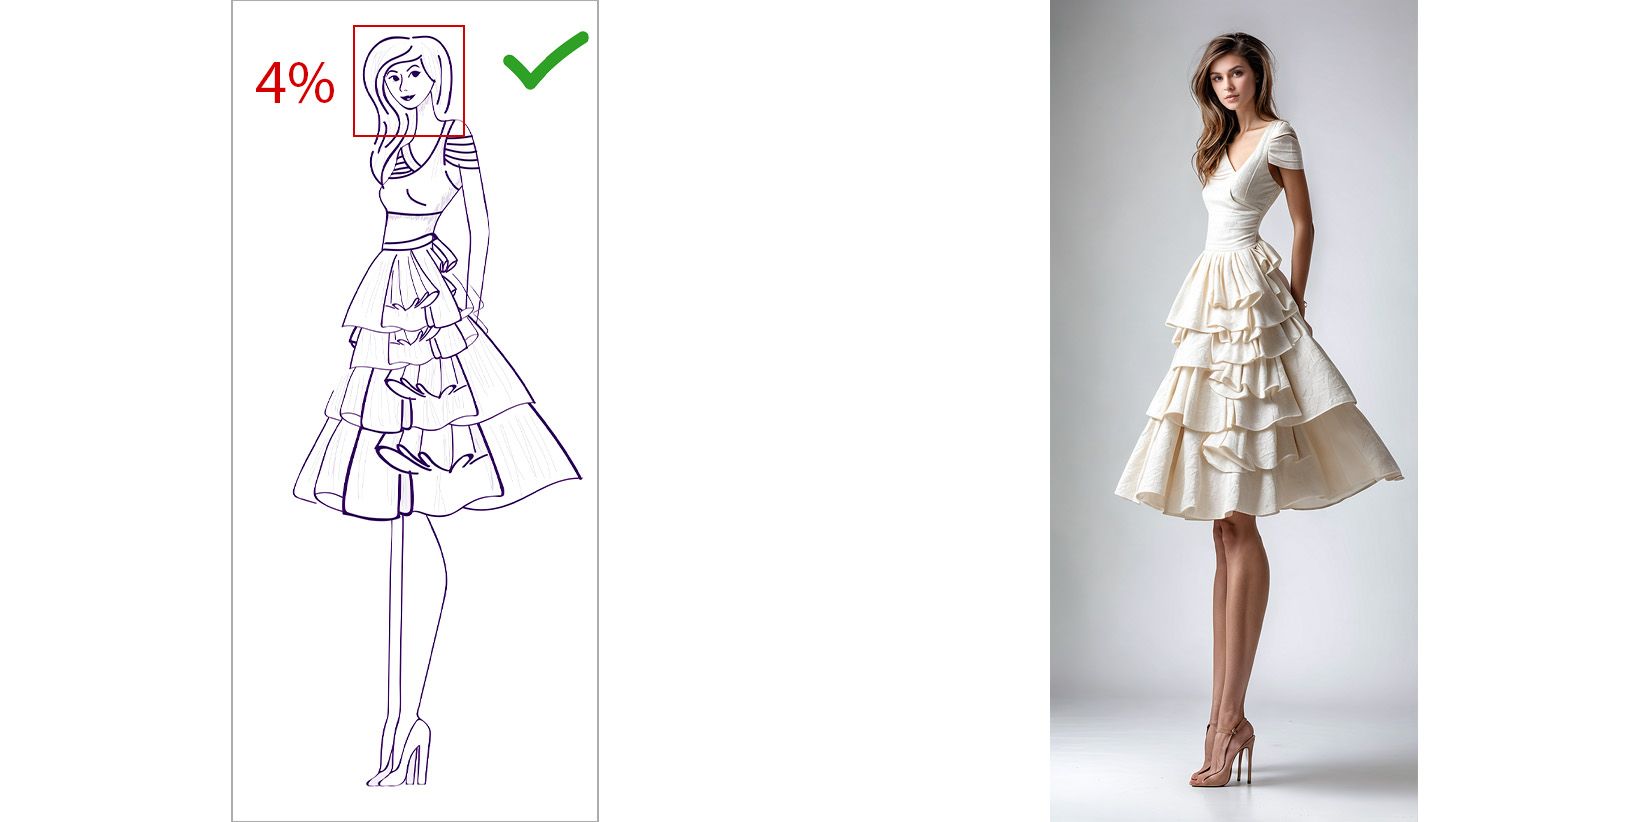
Here I have trimmed the white space on both edges. The area of the input image became smaller, while the area of the face remained the same. This means the face now takes up 4% of the input image. And the face in the generated image is now much better.
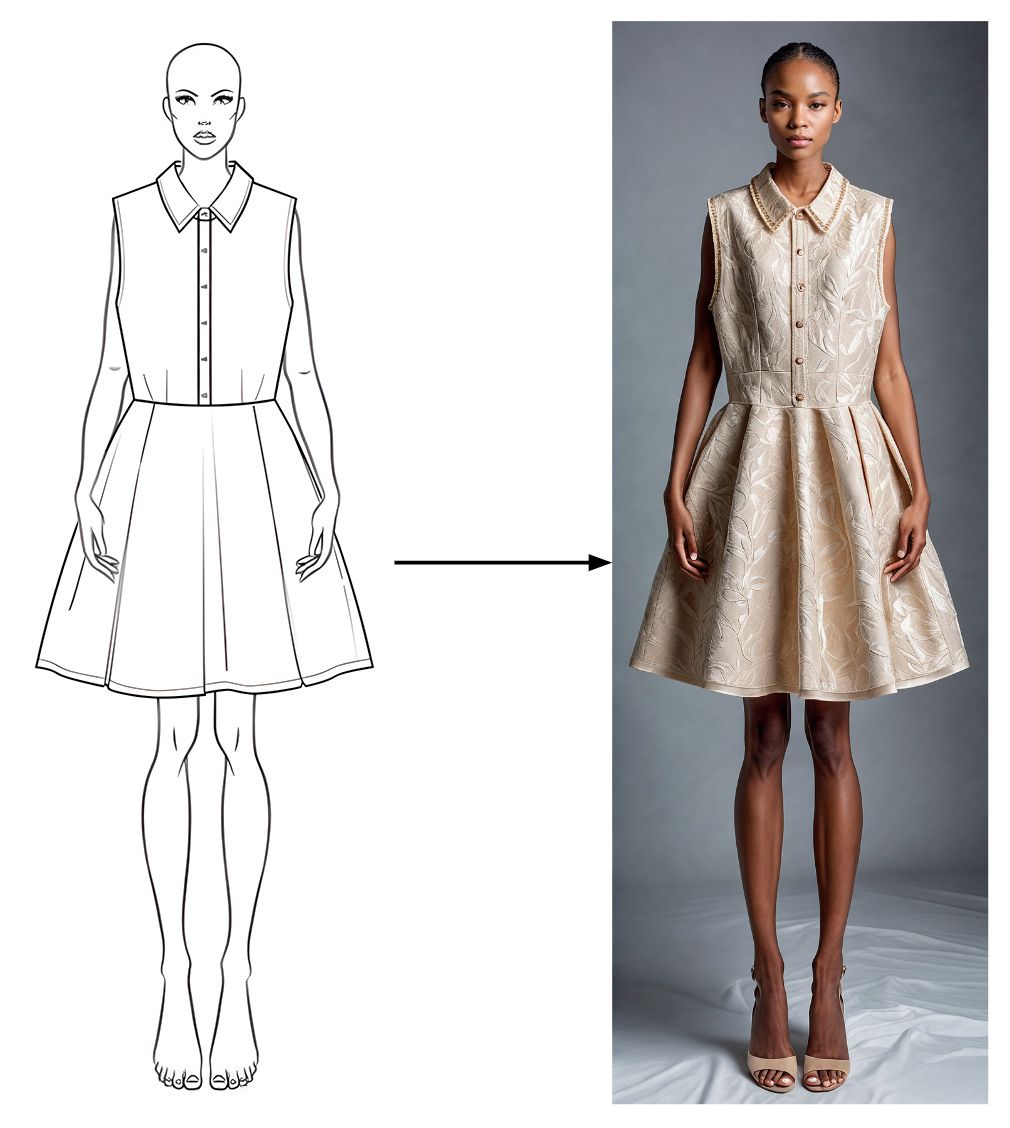
8. Use croquis to generate a garment on a model
If you'd like to have a model in your generated images, then add a croquis to your sketch.
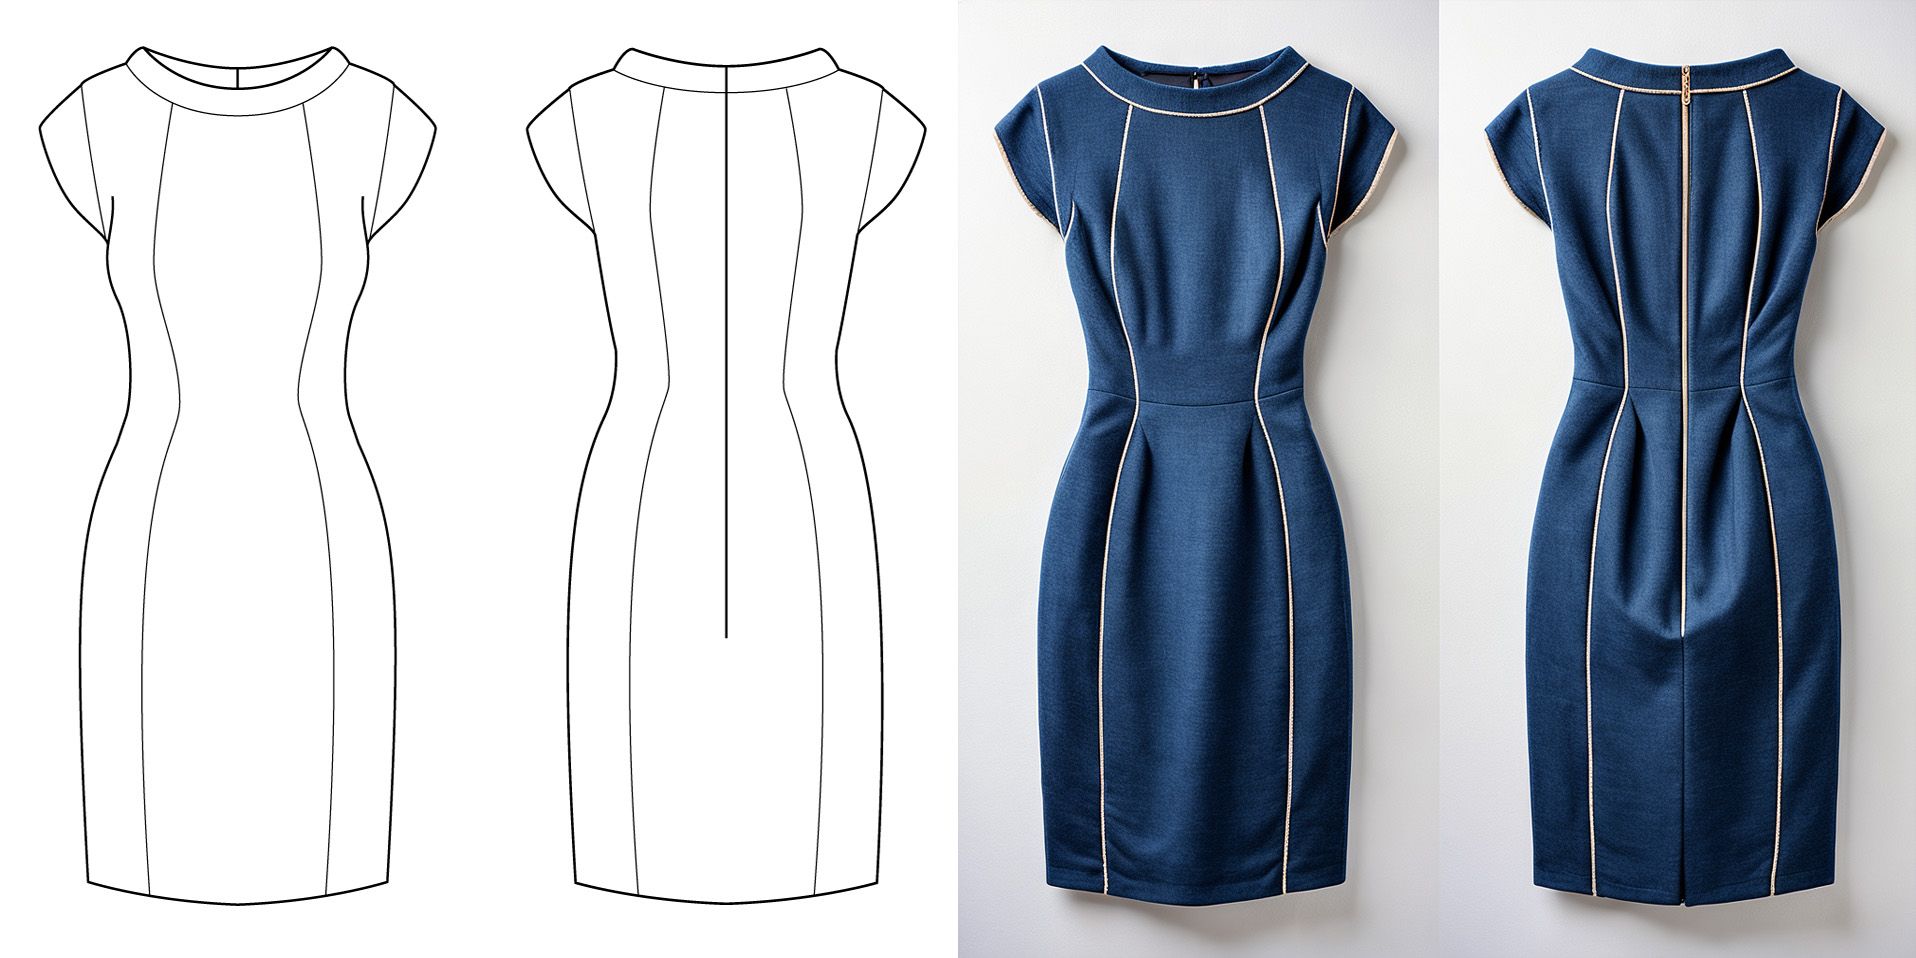
9. Multiple perspectives of the same object
If you generate an image with an object from multiple perspectives, it works pretty well with garments and sneakers in most cases. But if you take some more complicated things like tools, it might confuse the system. So just experiment and see how it goes.
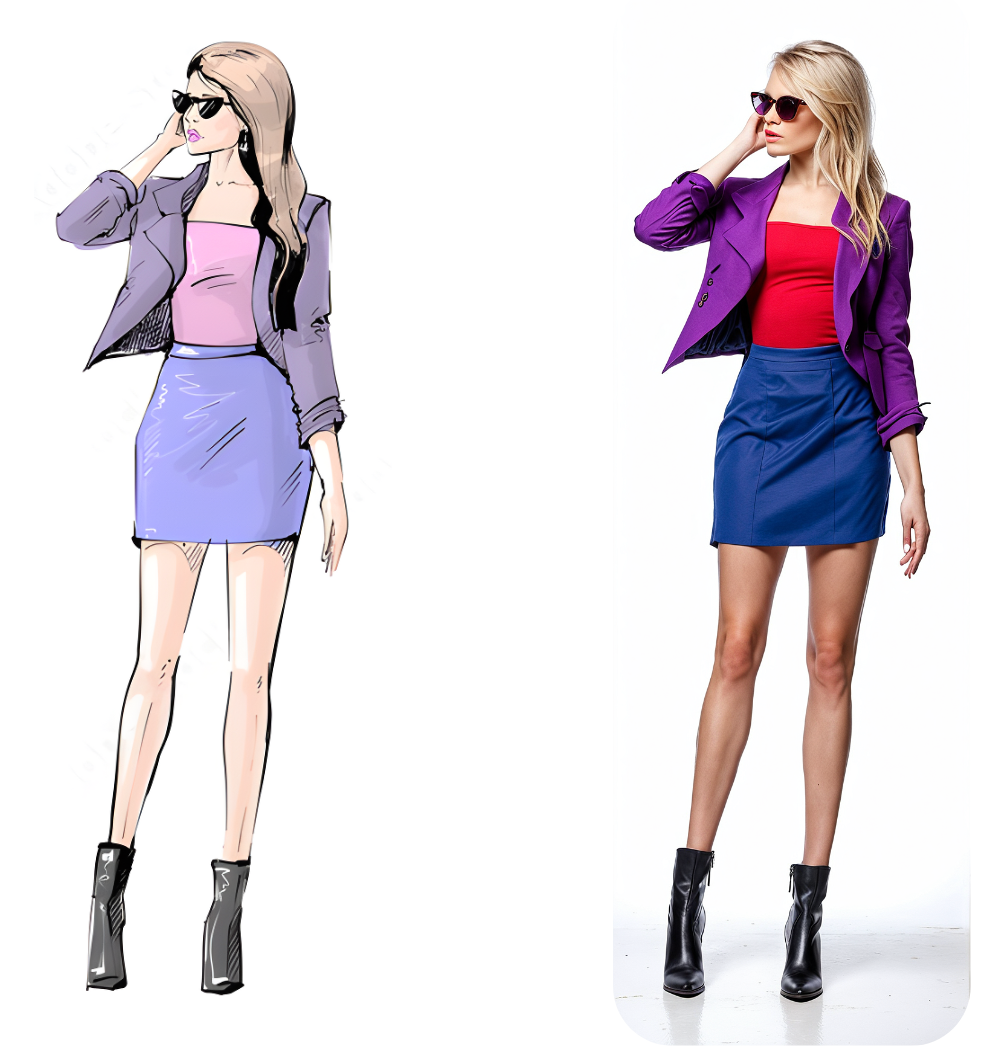
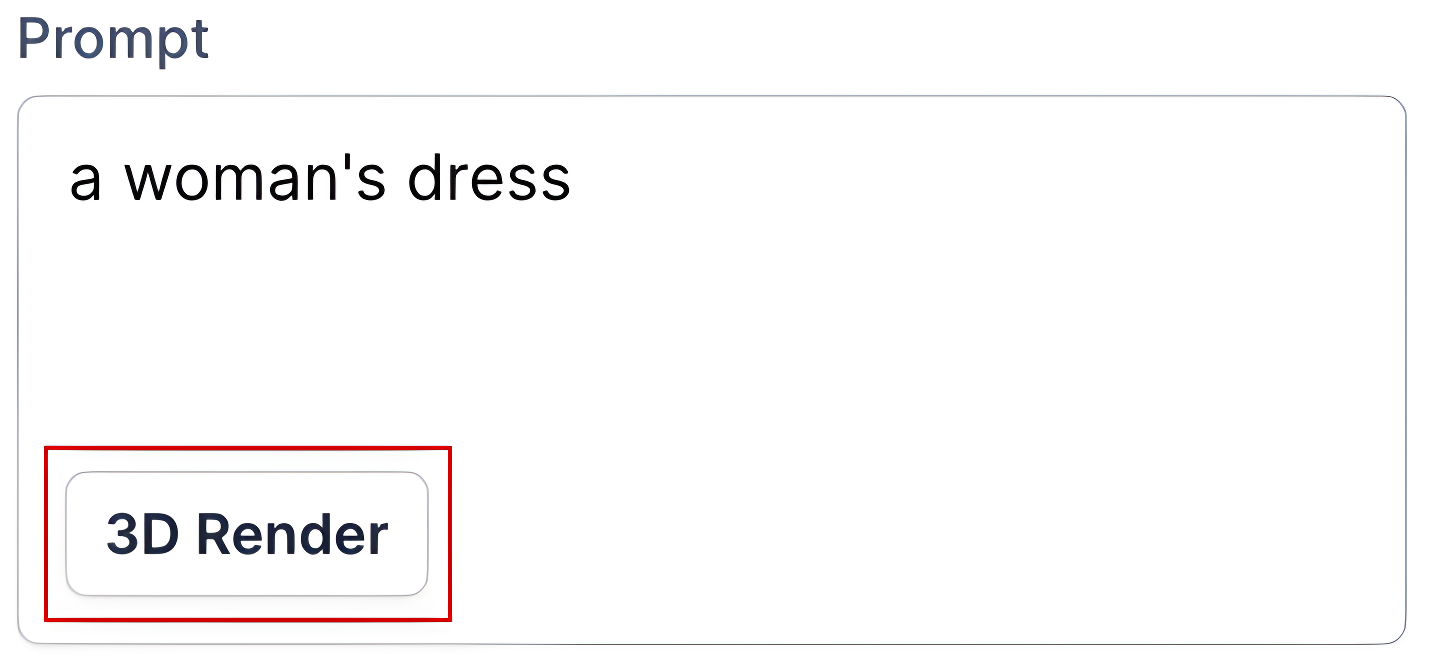
10. Add more detail to the prompt for more control
The fewer details you specify in the prompt, the more creativity you will give to the AI. So it will decide on colours and other things for itself.
If you describe colours, style, lighting, and so on, you'll likely see them in your generated images.
- Less control: A woman's dress
- More control: A blue woman's dress made of wool on a mannequin
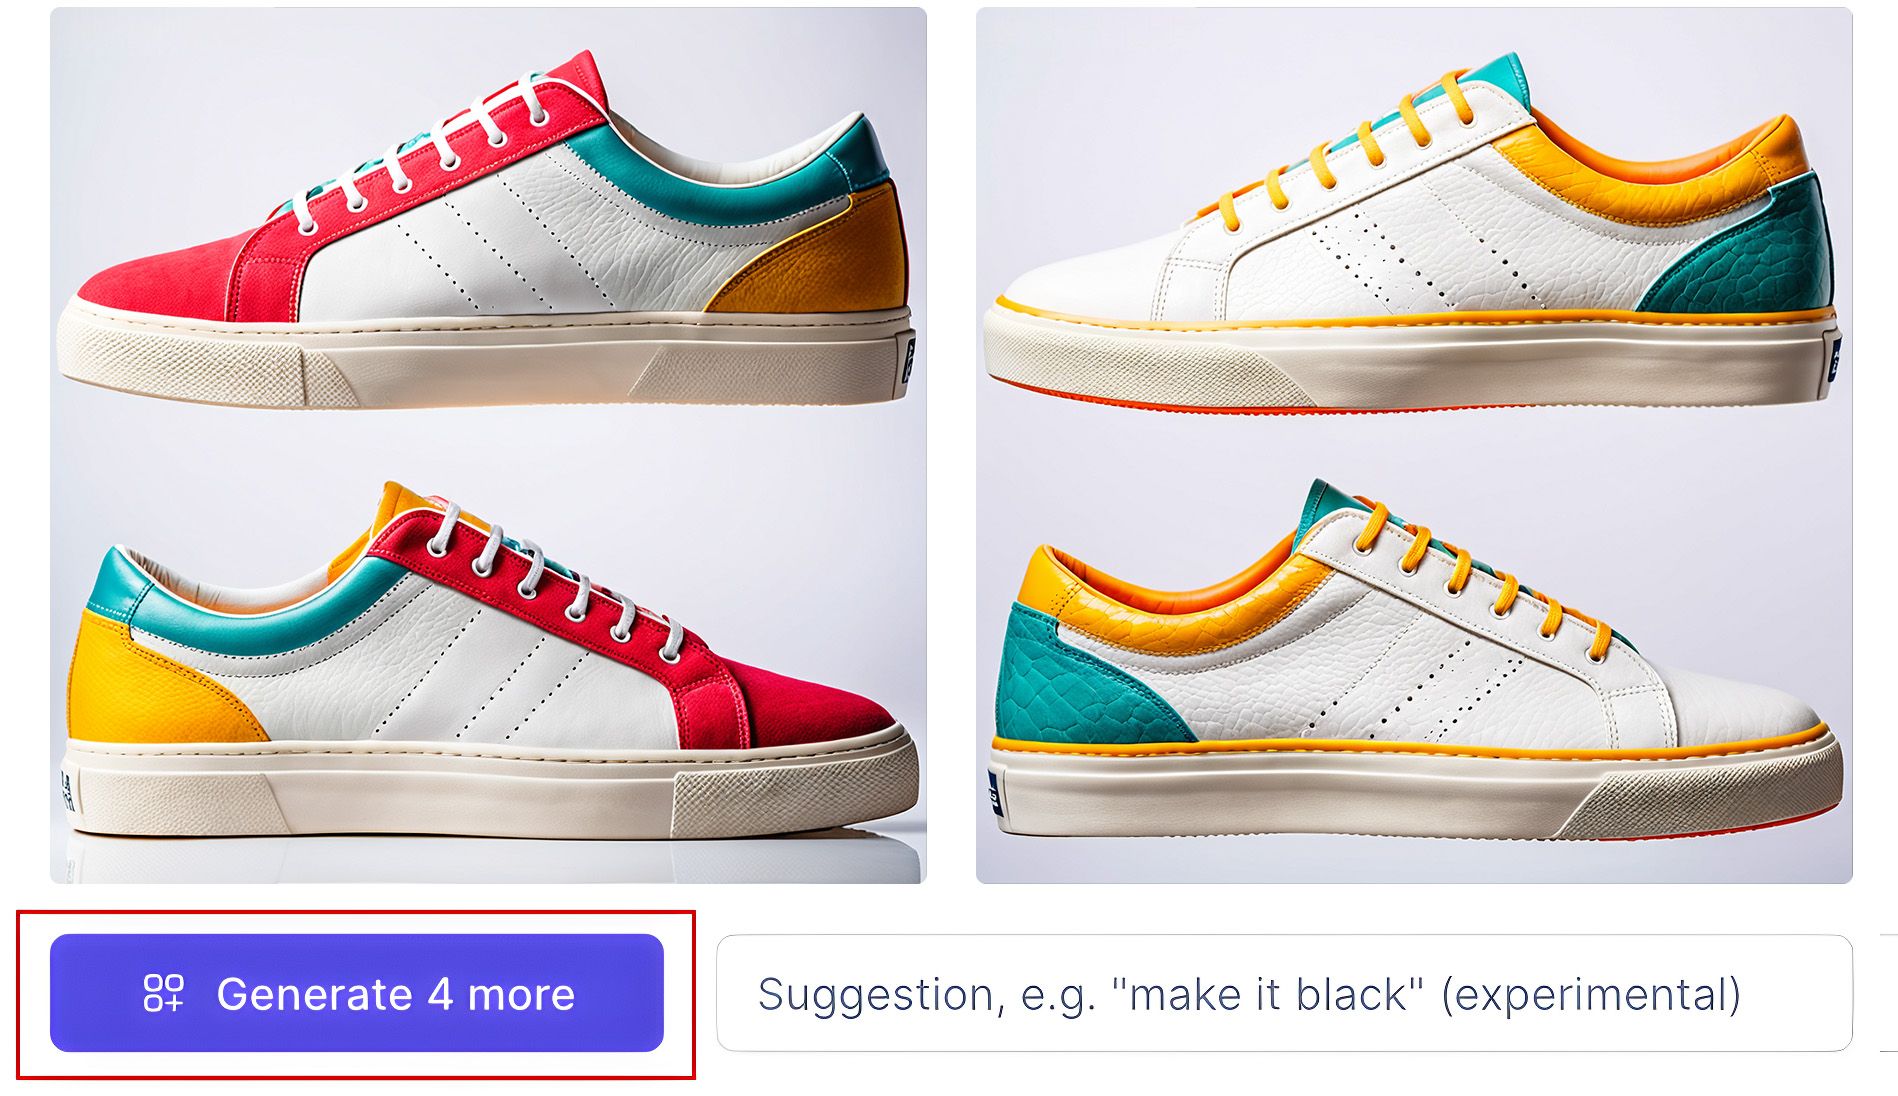
11. "Generate more" button
If you like the style in which the images have been generated in a batch, then hit the "Generate more" button below the generated images to get more images in the same style.
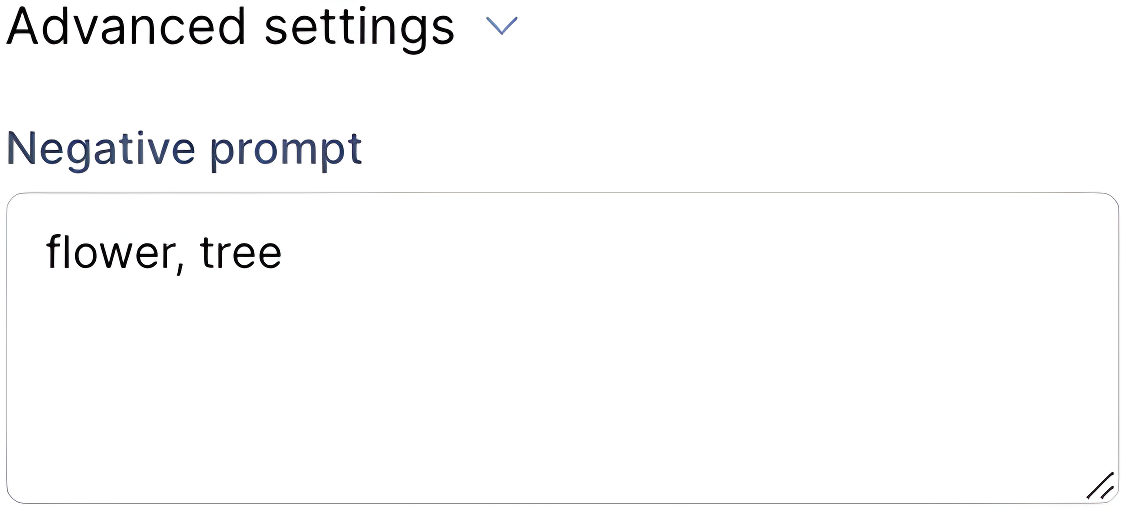
12. Negative prompt
If you don't want to see something in your images, put it in the Negative prompt field in the Advanced settings. If you don't want flowers and trees, add "flower, tree".
13. Multiple elements of the same kind
If you have two similar objects in your input image and you want to describe them separately, e.g. you have two people where one is female, and one is male, you will probably not get an accurate result.
AI can tell the difference between a chair and a person, but cannot tell the difference between two people in the input image.
14. Known concepts
We found that AI knows what some things should look like. E.g. a nose can't take up more than half of one's face because it's been trained on a ton of images where noses were of normal size. The same applies to any other object or a part of an object.
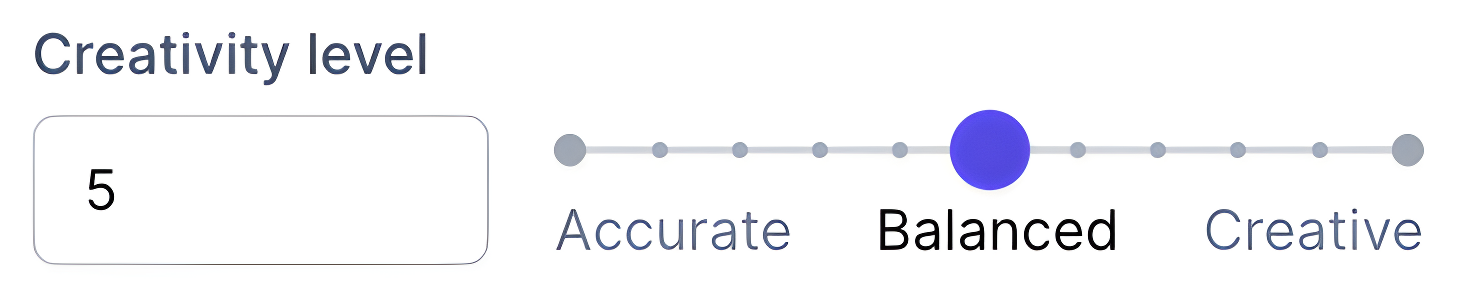
15. Play with creativity level
The lower the number, the more the resulting image will follow the input image's lines. You can try 10 as well as 1 and see the difference.
16. Keep text from a sketch
When your sketch includes text, like a brand name on a belt, make sure to describe it in your prompt (e.g., text "Tommy Hilfiger" on the belt). This helps the AI to clearly recreate the text in the generated images. If you don't specify the text in the prompt, the text in your generated image might not look right.
17. Try different styles
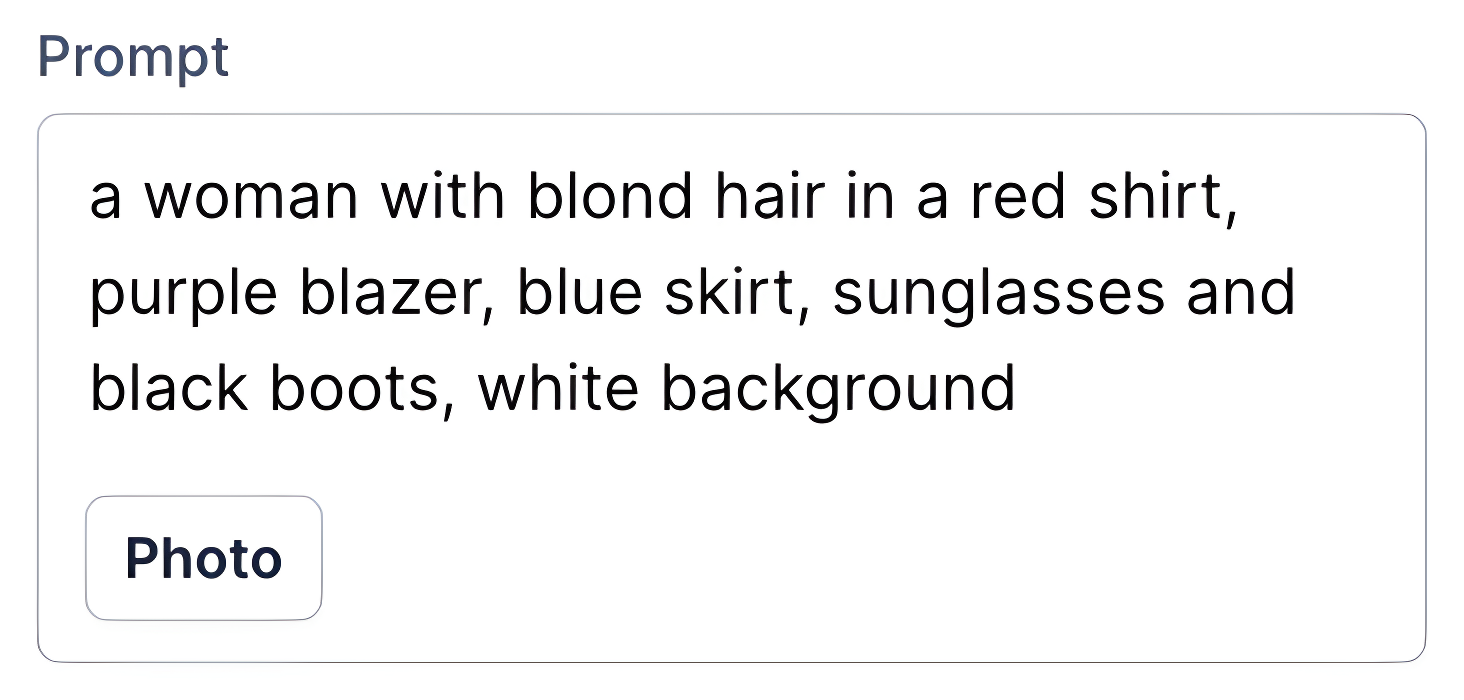
Choose a style to ensure you have more control over the resulting image. By default, we set the style to "Photo". But you can click on this button and choose a style that suits you.
18. Use Editing tools to add your finishing touches
If you want to get a refined image where you are happy with every subtle detail, you can use our Editing tools to put the finishing touches on the image to achieve perfection.
To sum up
In conclusion, remember that the secret ingredient to mastering NewArc.ai is experimentation. Don't be afraid to play around with the tool. With time and practice, the knowledge will sink in, and before you know it, using our service will be second nature to you.
If you stumble across any issues or just have a question, drop us a line at support@newarc.ai. We are here to help you unleash your creativity!
Finally, we'd love to see what you create with NewArc.ai. Sharing your work on social media helps us grow and improve, and it also allows you to inspire others. Don't forget to tag us and share your thoughts about your experience. We cherish your input and love hearing your ideas!
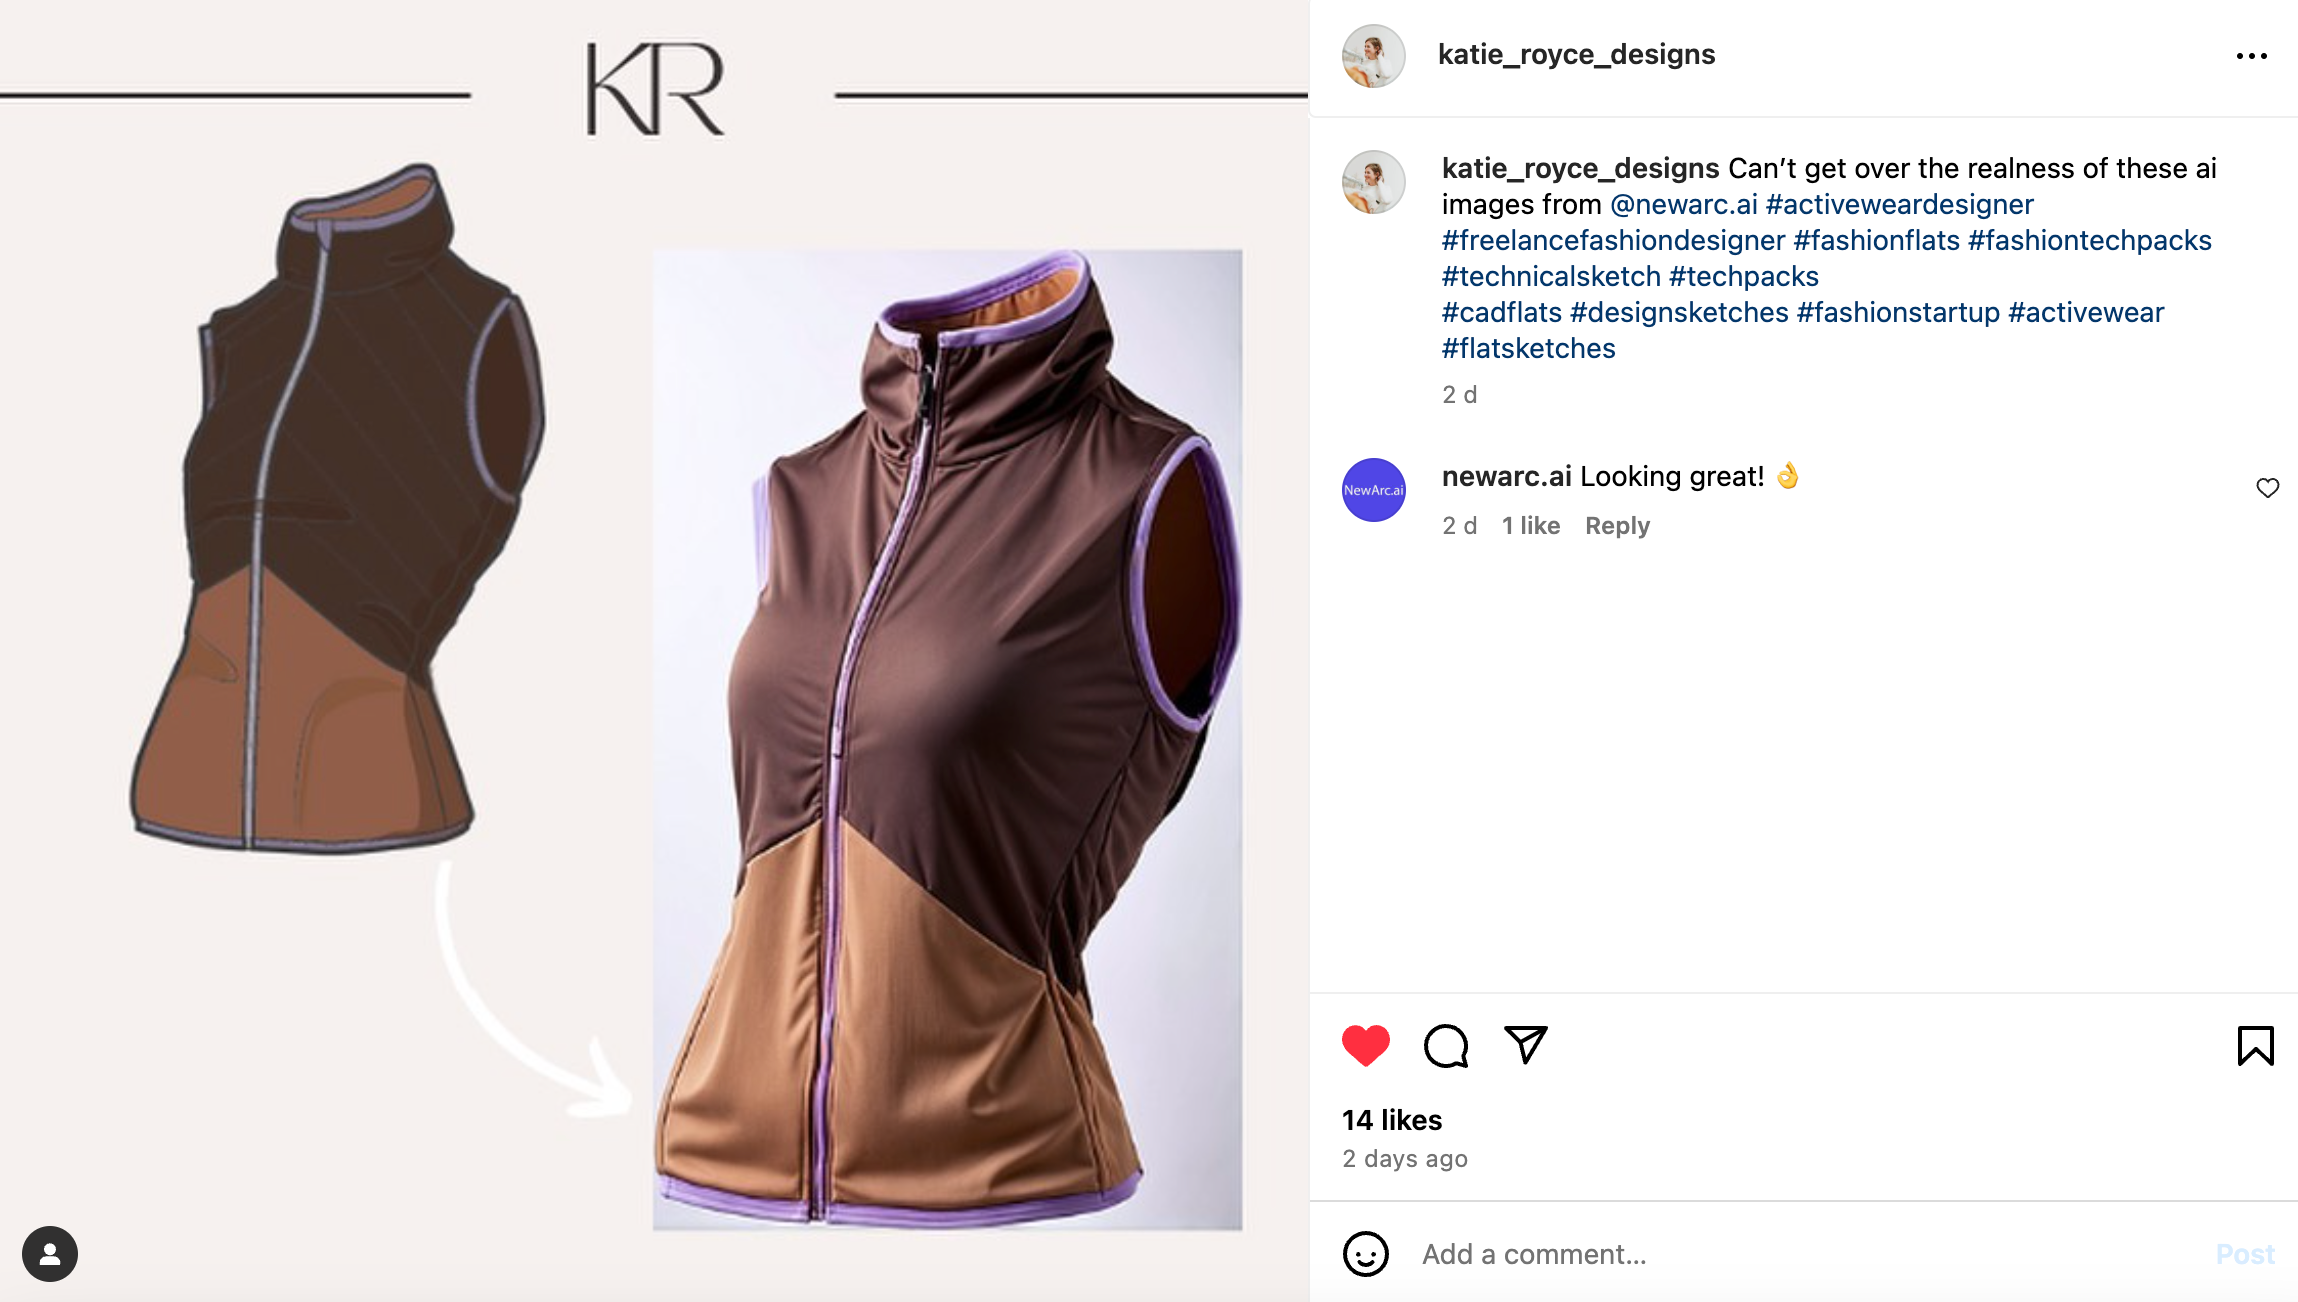
Be sure to follow us on Instagram and TikTok for updates, inspiration, and to be part of our creative community.
Thank you for your support, and happy creating!